
Searching for, creating, selecting, and editing employees
Using the previous article, you have successfully logged into eformity with your personal account. Before proceeding further with eformity, you need to create and select an employee. This article will guide you through searching, creating, selecting, and editing an employee. Below is a brief overview of all the topics covered:
- Open the sidebar in Microsoft Word
- Go to 'Your account'
- Click on 'Employee'
- Searching, adding, selecting, or editing an employee
Step 1: Open the sidebar in Microsoft Word
The first step is to open Microsoft Word and the eformity sidebar. Once Microsoft Word is loaded, the sidebar will open automatically.
If the sidebar does not open automatically, you can do so manually by clicking the button circled in the image below.

Step 2: Go to 'Your account'
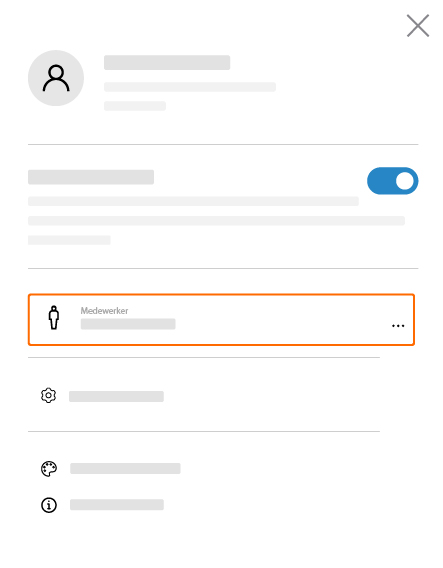
Next, you can access your account in the sidebar. You can easily open your account by clicking on the profile picture in the sidebar. The 'profile picture' is circled in the image below.

Step 3: Click on 'Employee'
Once the account section is open, you will see various options appear. For now, simply click on the section labeled 'Employee'. This is circled in the image below.
Step 4: Searching, adding, selecting, or editing an employee
In the previous step, a new window has opened. In this window, you can search, add, select, and edit employees. Below are detailed instructions for each part.
Searching for an employee
You can search for employees manually or by using the search option. To search manually, you can use pagination (1 in the image). The search bar (2 in the image) can be used by entering a name and pressing the 'Enter' key. You can also click on the magnifying glass (3 in the image) to execute the search.

Adding an employee
If no employees exist yet (usually the case) or if you want to add a new employee, click on 'Add'. The location of this option is shown in the image below.
My colleagues are not listed here?
That's correct! The employees you add are specifically linked to your account. Your colleague's account will not display here.

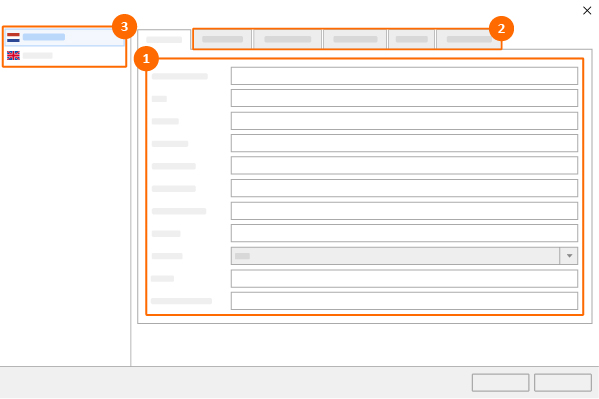
After clicking on 'Add', a new window will appear. In this window, you can enter the personal details of the employee, such as name, email, phone number, etc. (1 in the image).
Additionally, you can use the tabs (2 in the image) to add additional information about the employee. Finally, you can add translations of the employee's details (3 in the image).
Selecting a default employee
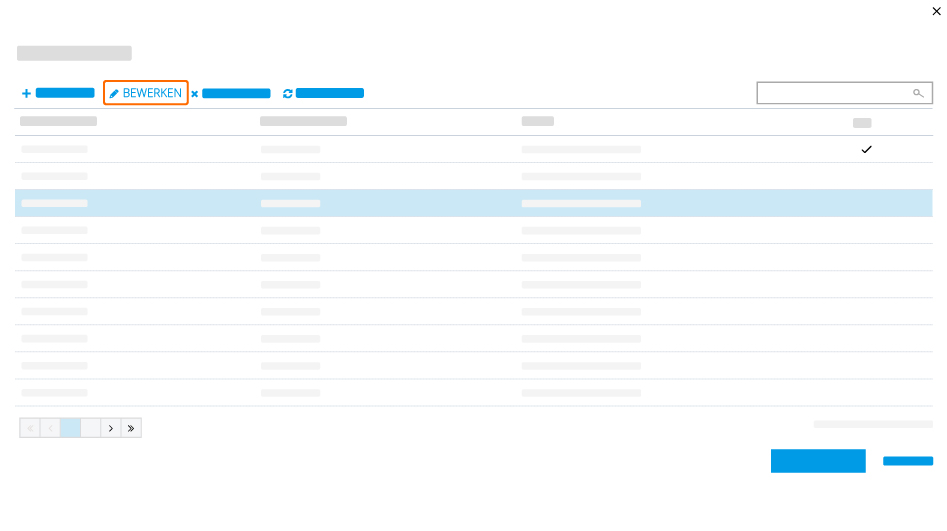
Once you have created an employee, you need to select them as your default employee. To select a default employee, click on a name (number 1 in the image) in the table. The selected row will have a light blue background. The image below shows what this looks like.

Now, click on the blue button 'Select' (number 2 in the image above). The window will close, and the default employee is now selected. The selected employee will appear in the sidebar under 'Employee' in your account.

Easily create documents on behalf of colleagues!
Switch between employees easily using the steps above to create documents on behalf of colleagues.
Editing an employee
In addition to creating new employees, you can edit existing employees. To edit an employee, first select an existing employee.
To select an employee, click on the row in the table. Once the employee is selected, you can click on the 'Edit' text. A new window will open.
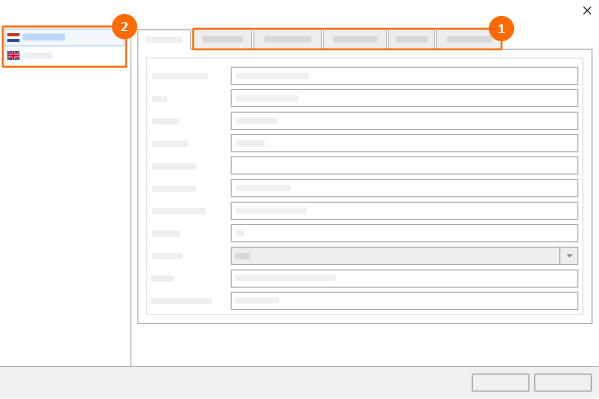
In this new window, you can edit the selected employee. Use the tabs (1 in the image) to modify additional information. You can also edit the translations of the employee by clicking on the languages in the left column (2 in the image).
Will this change my colleague's account?
No. This employee section is specifically linked to your account. Colleagues can create and edit their own employees within their own account.
Congratulations!
You have just set up the basics of eformity! You can now use all functionalities as a user.