
How to add a (temporary) banner to the Outlook signature (classic)?
Classic version
This article is for the classic version. Discover how to add a (temporary) banner to the Outlook signature in the updated version of eformity.
During a holiday or event, you might want to place a (temporary) banner in the email signature. Within eformity, you can easily add a (temporary) banner to the Outlook signature for the entire organization. Follow these three steps:
- Open 'Settings' in Microsoft Outlook
- Select and edit the desired organization
- Create a campaign
Step 1: Open 'Settings' in Microsoft Outlook
The email signature can be edited in the Template Manager. The Template Manager is generally accessible from any Microsoft application that works with eformity. In this article, we use Microsoft Outlook. Open 'Settings' in Microsoft Outlook.

Step 2: Select and edit the desired organization
After clicking on the 'Settings' button (from the previous step), the Template Manager will open. You can now navigate to 'Organization' (1 in the image). A list of all created organizations (usually 1 or 2) will appear. Select an organization from the list.
You select an organization by clicking on the name (or row) of the organization. When an organization is selected, the background will turn light blue (2 in the image). Then, you can 'Change' the organization (3 in the image).

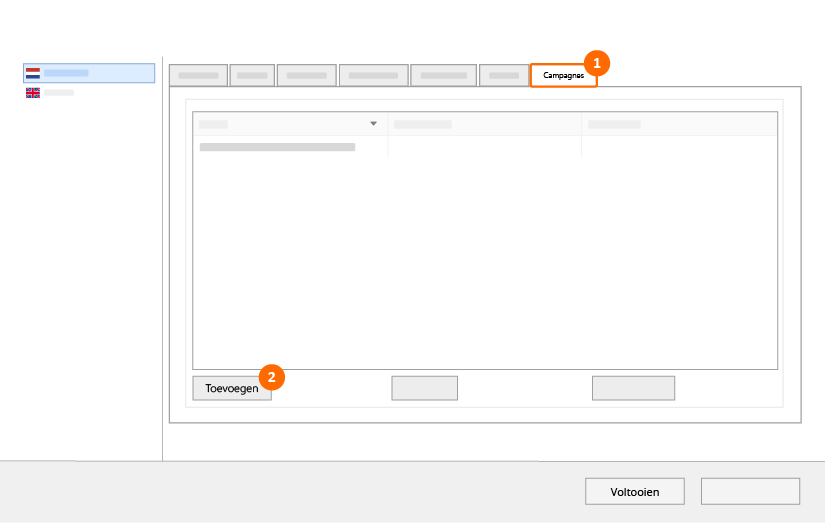
Step 3: Create a campaign
In the previous step, a new window was opened. To create a campaign, first click on the 'Campaigns' tab (1 in the image). You will now see an overview of all campaigns. Click on the 'Add' button (2 in the image).
Another new window will open. In this window, you can add the display name, start date, end date, text, url, and image for the campaign. Once you have entered all the details, click the 'Finish' button.
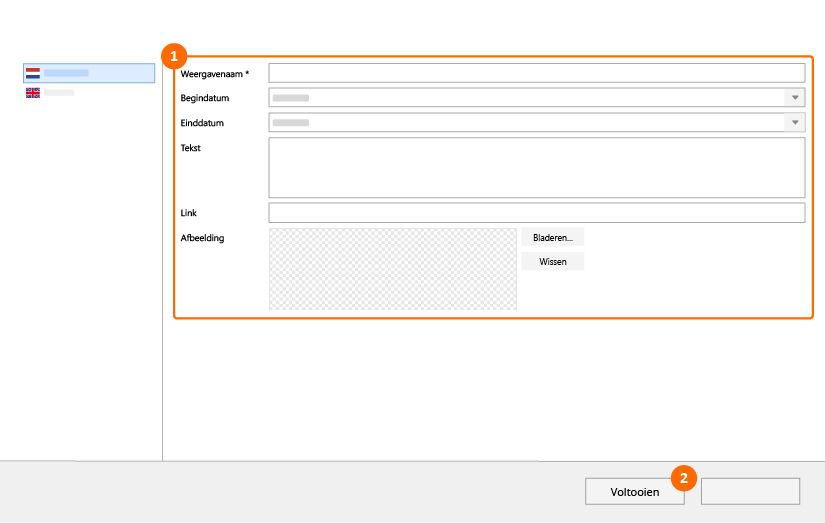
| Field | Description |
|---|---|
| Display name (required) | Give the campaign a unique name so you can recognize it later in the overview. This name will not be displayed in the banner. |
| Start date | Enter the date from which you want the banner to be shown. |
| End date | Enter the date until which you want the banner to be shown. |
| Text | Add extra text to the temporary banner/line. |
| Url | The text or image becomes clickable. If users click on the text or image, they will be redirected to this web address. |
| Image | Upload an image to use as the (temporary) banner. |
Note!
If you provide both text, a link, and an image, the image will be displayed with clickable text below it (linked). When you only add text and a link, the text will be clickable with the link. If you provide only an image and a link, the image will be clickable with the link.