
Everything you need to know about the 'Account Menu'
In the previous article, we discussed the sidebar in general. In this article, we will explore each option within the 'Account Menu' separately.
Opening the 'Account Menu'
The account menu can be found in the sidebar of eformity. The sidebar opens automatically when you open a document in a Microsoft application that works with eformity. If the sidebar does not open automatically, you can click on the 'Show/Hide Sidebar' button in the ribbon.

Once the sidebar is open, you can navigate to the account menu. You open the account menu by clicking on the 'profile photo' in the sidebar.

The 'Account Menu' will now open. There are several options within this menu. The image below shows all these options numbered in the menu.
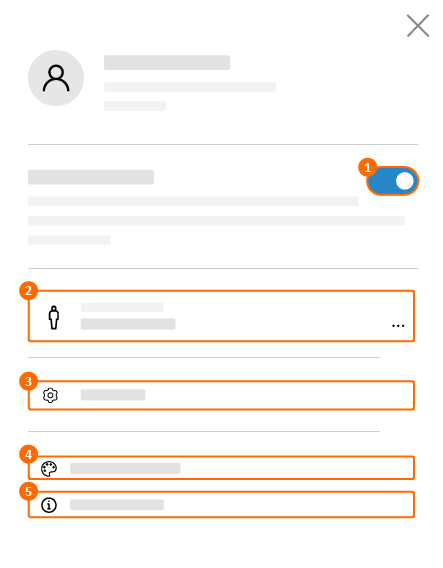
N_1: Edit mode
This button toggles 'Edit mode' on or off. 'Edit mode' is disabled by default when starting a Microsoft application. Turn it on to make all options visible.
N_2: Employee Menu
Clicking this item opens the employee menu. In the employee menu, you can select, add, or edit an employee.
N_3: Settings
'Settings' can also be found in the account menu. When you open the settings, you can adjust various options, including changing the dialog language.
N_4: My Preferences
Within the account menu, you can also set your own preferences. For example, you can choose a different theme for the sidebar, enlarge the text in the sidebar, and set the menu to expand by default.
N_5: About eformity
The final item in the 'Account Menu' is 'About eformity.' Here, you can find more information about the current version of eformity and general information about the system.