
Installation via Microsoft Intune (MSI)
There are several ways to install eformity. One of the most common ways within organizations is through Microsoft Intune. In this article, we tell you in clear steps how to do this.
Step 1: Login to Microsoft Intune
To install eformity through Microsoft Intune, you must first log in with your personal information. Once you are logged in, you can proceed to the next step.
Step 2: Add new app
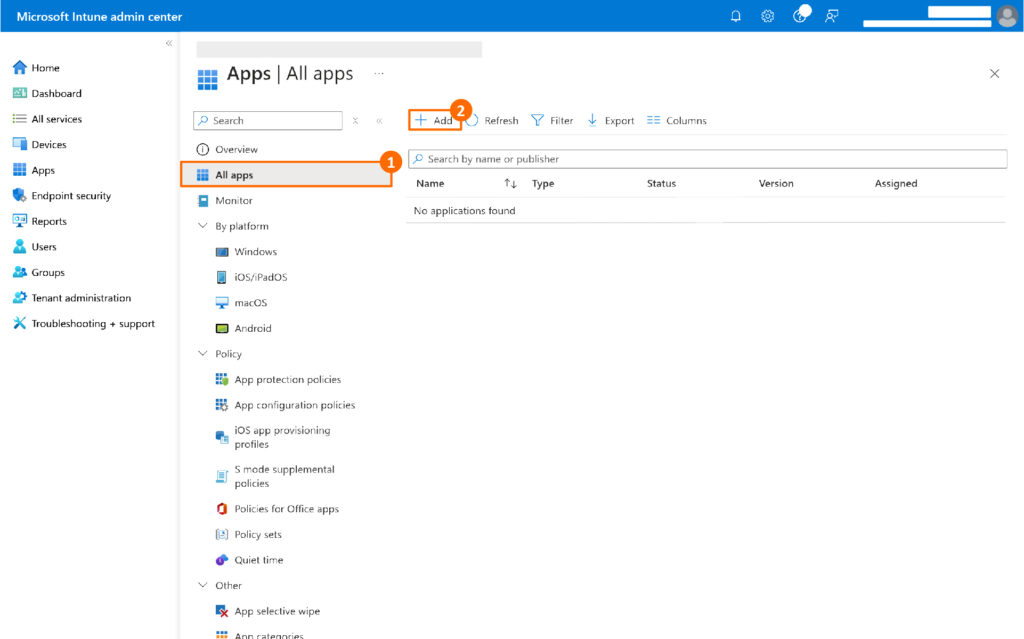
When you are logged in, you can add a new app. You do this by first clicking on 'Apps' in the menu. In the image below, you can see where this element is located.

Then click on 'All apps'. A new page will now open. On this new page, you can see an overview of all the apps. To add a new app, click the 'Add' button.
Step 3: App setup
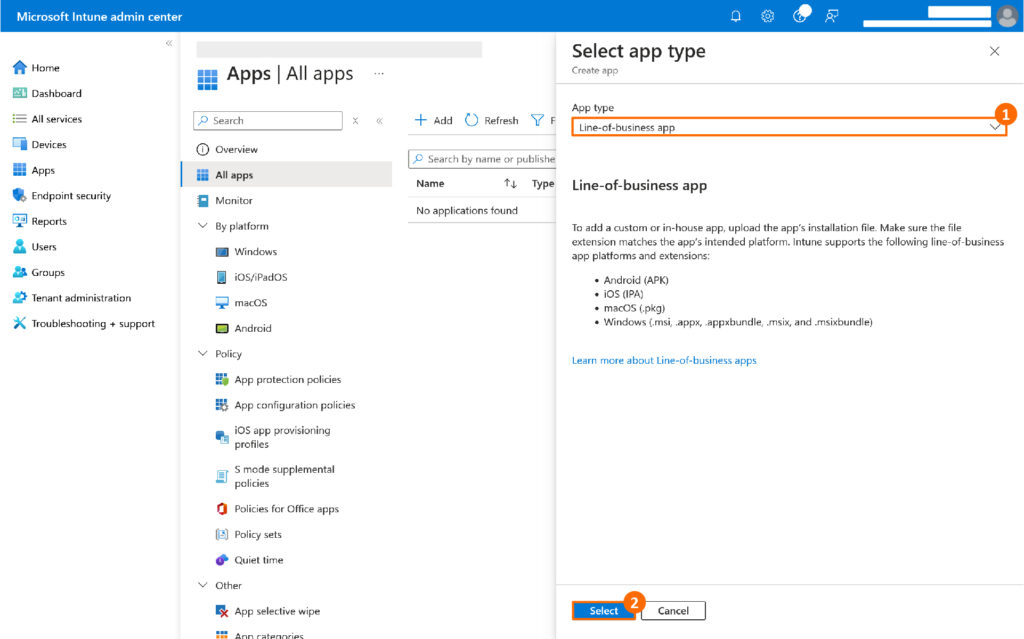
Once you clicked 'Add,' a new element opens on the right side of the page. This new element asks for an 'App type'. Choos 'Line-of-business app'.
MSI Upload
Then click the blue 'Select' button to continue. You will now be prompted for a file. Upload the latest version of the MSI.

Add app information
In the next screen, information about the application can be provided. Most fields are optional, but the following two fields must be modified for proper operation:

| Field name | Value |
|---|---|
| Publisher | eformity document solutions b.v. |
| Command-line arguments | SUBSCRIPTION=customer name REBOOT=ReallySuppress |
Under 'customer name' in the 'Command-line arguments' field, enter your assigned subscription code (which you received from us).
Note!
In addition to the 'Publisher' and 'Command-line arguments' fields, the 'Name' and 'Description' fields are also mandatory.
Set scope tags
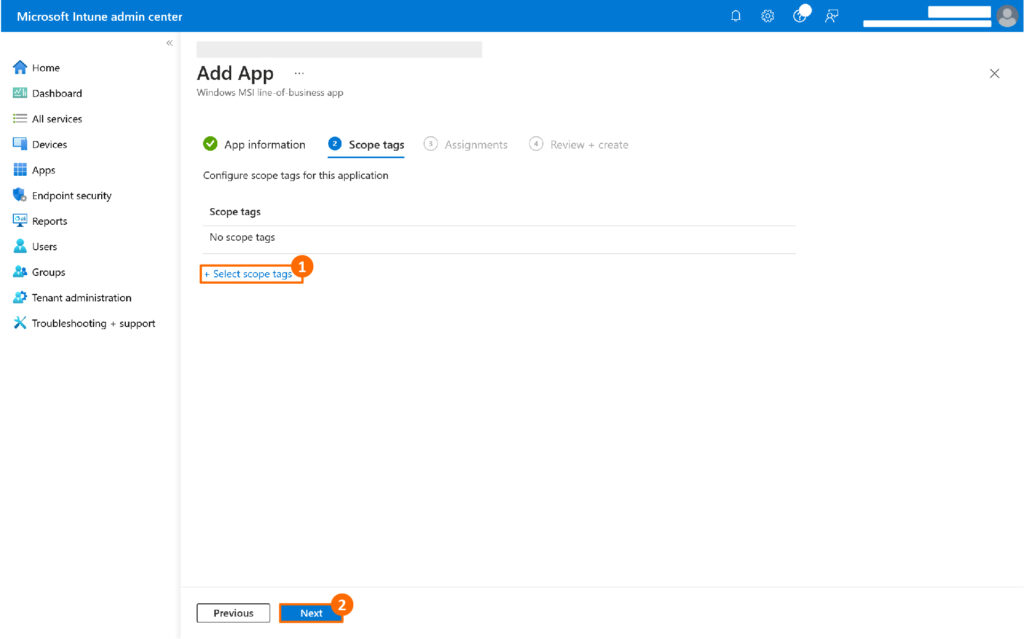
Once you have added the 'App information', you need to click on the blue Next button. In this next screen, you can set the 'Scope tags' for the app. Complete this if desired and click Next.
Adding Assignments
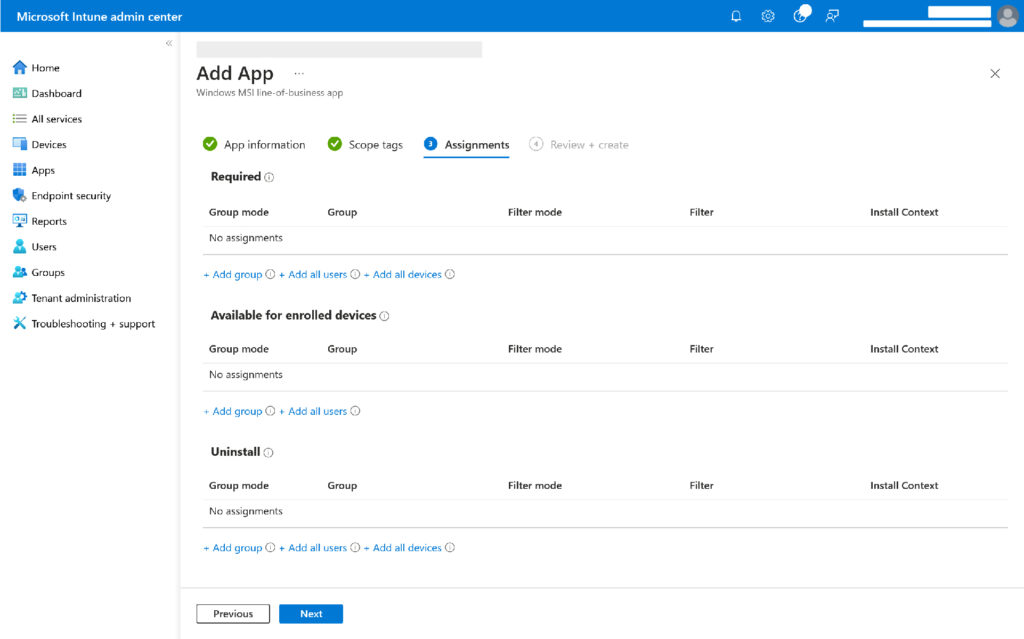
On the next screen, specify which devices to deploy the software to. Here, we recommend testing the installation with a small group of users first. Then press Next again.
Step 4: Finalize and verify installation
On the last page, check all the information and, if everything is correct, press 'Create' to create the application. The application should now roll out automatically to specified users.
