
Creating your own (demo) account
If you want to try the 30-day trial period, you must first create an account. This article can also be used for users who do not yet have an account. In most cases, however, the system administrator will set up accounts.
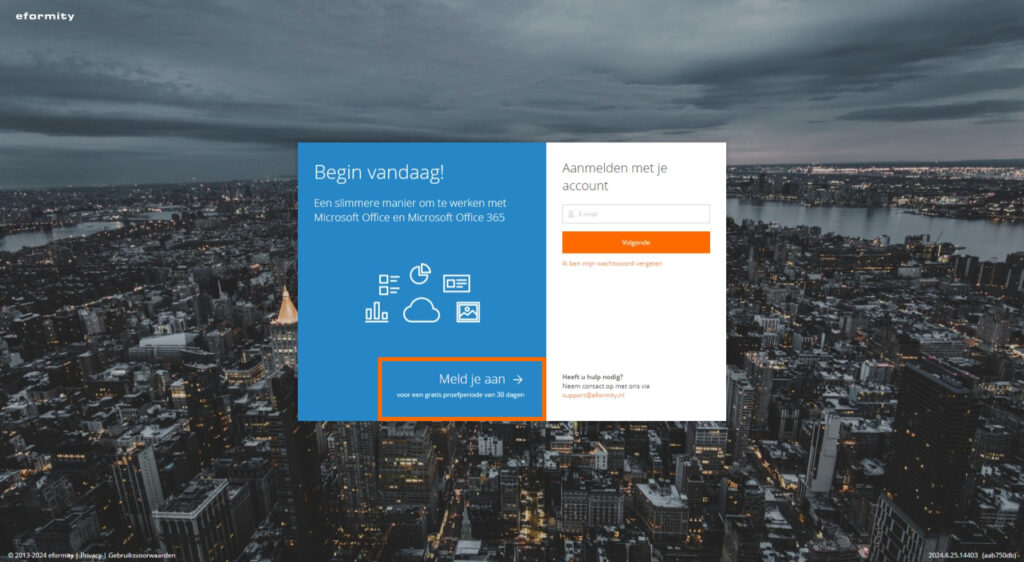
Step 1: Go to eformity.net
Creating an account is done through our online environment, https://eformity.net/. This environment will also be used later for configuring your subscription. Once the page has loaded, click on 'Sign Up' to create an account.
Step 2: Create the account
When you click 'Sign Up', a new page will open. On this page, you can create a new subscription and account. Below is an image of what this page looks like, followed by a brief description of each field.
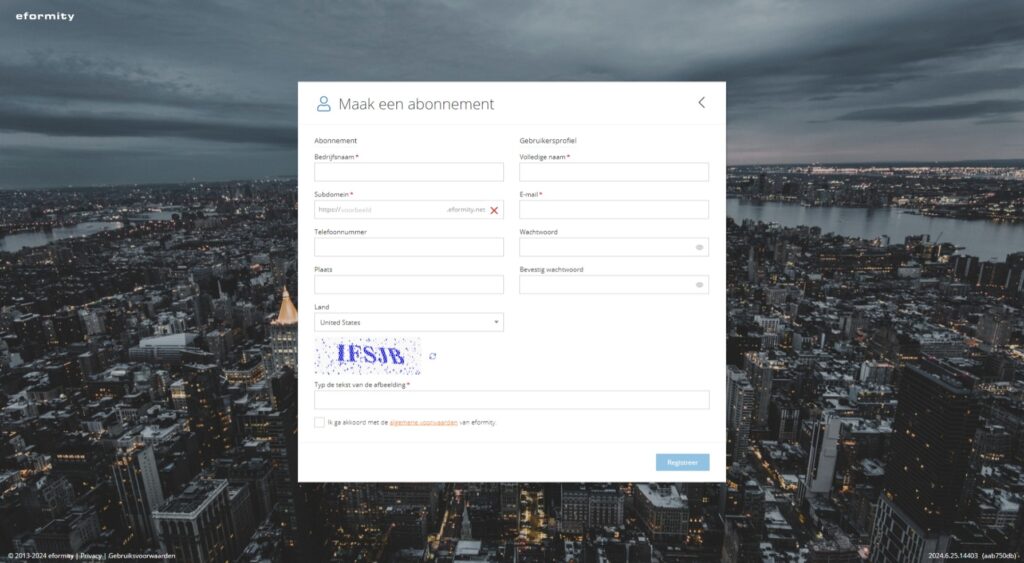
| Field name | Description |
|---|---|
| Company name (required) | Enter the name of the organization where you work. |
| Subdomain (required) | Each company runs on its own environment. Enter the desired subdomain here. We recommend using the company name. |
| Phone number | Enter the phone number of the organization. |
| City | Enter the city where the organization is located. |
| Country | Enter the country where the company is located. |
| Type the text from the image (required) | Type the text from the image to prevent robots from creating accounts. |
| Full name (required) | Enter your full name here. |
| Email (required) | Enter your personal email here. Always use your work email address, not Gmail or Hotmail. |
| Password | Enter the desired password for your account. |
| Confirm password | Re-enter the desired password. |
| I agree to the terms and conditions | Review the terms and conditions and check this box to agree. |
Step 3: Complete registration
Once you have filled in all the fields, click on the blue 'Register' button to complete the registration. You will then receive a confirmation email at the provided address containing a link to confirm your account.